This is one of the biggest problem linux users face i.e. to share your ethernet connection over wifi for your android or windows mobile device. Here is a simple step process to easily set up a hotspot on your laptop to connect your mobile devices to surf on the go!
 1. We need to install 2
additional tools to make our hotspot work:
1. We need to install 2
additional tools to make our hotspot work:- hostapd(hotspot server)
- dnsmasq(dns dhcp server)
Open the terminal (Ctrl+alt+T) and type:
sudo apt-get install hostapd dnsmasq
and press enter. Wait for them to install.
2. Stop these services and prevent them from starting on system start up. To do that; open a terminal and type each command per line and press enter:
sudo service hostapd stop
sudo service dnsmasq stop
sudo update-rc.d hostapd disable
sudo update-rc.d dnsmasq disable
3. Now we need to set the configuration files for both the installed tools.
To open the config file of dnsmasq; open a terminal (Ctrl+alt+T) and type
sudo gedit /etc/dnsmasq.conf
sudo gedit /etc/dnsmasq.conf
As you press enter a window with some text will pop up. Ignore the text if you don't understand it and add these lines to the window opened.
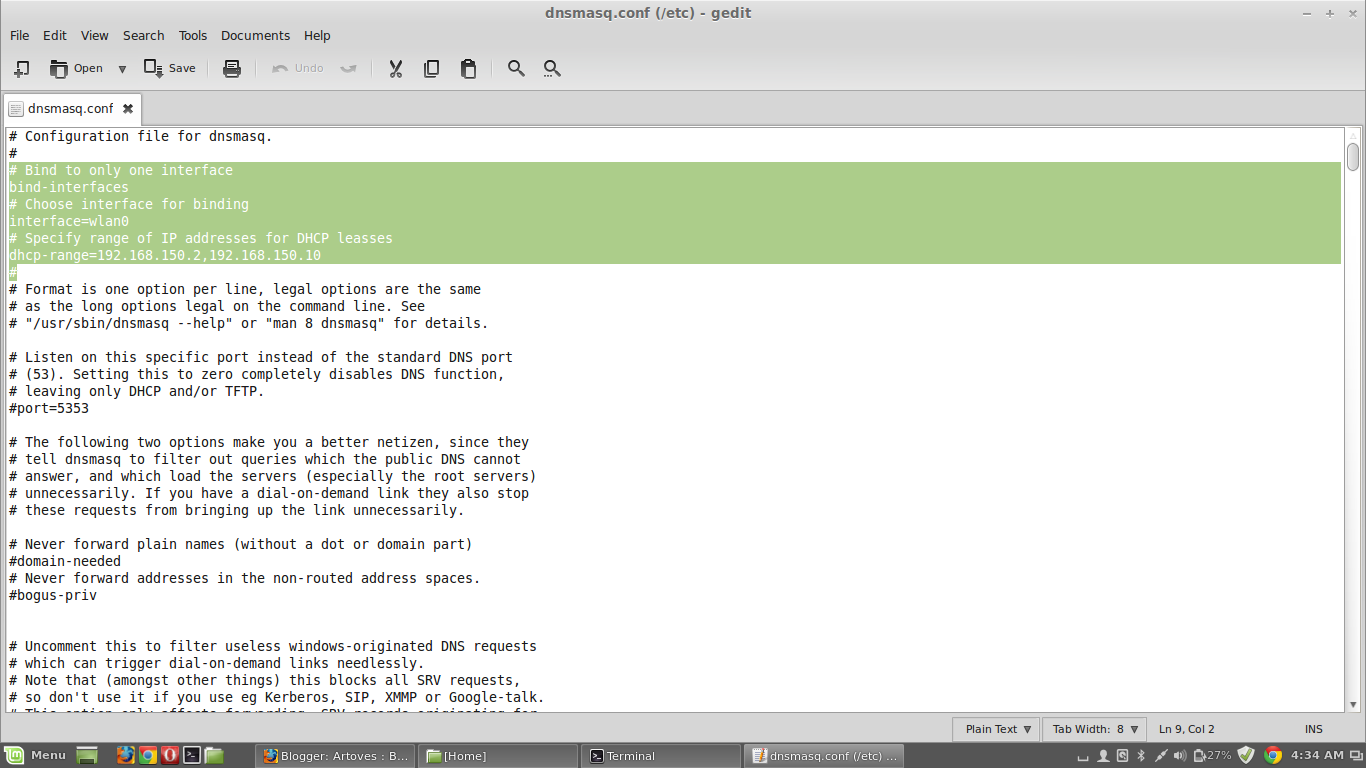 Code:
Code:# Bind to only one interface
bind-interfaces
# Choose interface for binding
interface=wlan0
# Specify range of IP addresses for DHCP leasses
dhcp-range=192.168.150.2,192.168.150.10
4. To open the config file of hostapd; open a terminal (Ctrl+alt+T) and type
sudo gedit /etc/hostapd.conf
As soon as you press enter a blank window will appear. Add the following lines to the window opened.

# Define interface
interface=wlan0
# Select driver
driver=nl80211
# Set access point name
ssid=myhotspot
# Set access point harware mode to 802.11g
hw_mode=g
# Set WIFI channel (can be easily changed)
channel=6
# Enable WPA2 only (1 for WPA, 2 for WPA2, 3 for WPA + WPA2)
wpa=2
wpa_passphrase=mypassword
You can change ssid (name of the hotspot) and password to anything you want here in this file. The current config will create hotspot named myhotspot with the password as mypassword.
5. Now create a file anywhere with anyname.sh according to your preference. I recommend to create a startwifi.sh file in the home folder. To do this, open a terminal (Ctrl+alt+T) and type:
sudo gedit startwifi.sh
and a blank window will appear named startwifi.sh.
This file will hold the information to start the hotspot when you want to. Now add the following lines to this file and save the file.
and a blank window will appear named startwifi.sh.
This file will hold the information to start the hotspot when you want to. Now add the following lines to this file and save the file.

#!/bin/bash
# Start
# Configure IP address for WLAN
sudo ifconfig wlan0 192.168.150.1
# Start DHCP/DNS server
sudo service dnsmasq restart
# Enable routing
sudo sysctl net.ipv4.ip_forward=1
# Enable NAT
sudo iptables -t nat -A POSTROUTING -o eth0 -j MASQUERADE
# Run access point daemon
sudo hostapd /etc/hostapd.conf
# Stop
# Disable NAT
sudo iptables -D POSTROUTING -t nat -o eth0 -j MASQUERADE
# Disable routing
sudo sysctl net.ipv4.ip_forward=0
# Disable DHCP/DNS server
sudo service dnsmasq stop
sudo service hostapd stop
6. Finally you can start your hotspot by starting our script. Run it using the sh command in the terminal, for me it looks like this:

because I have it in my home folder.

Or you can make the file executable to double click and run. In order to do so, right-click the file and go to Properties and select the permissions tab. Mark the allow executing the file as a program and close the dialog. Now you may double click the file to run in terminal.
Comments
Post a Comment